AWS CI/CD By Example
A while back I wrote an article about AWS CI/CD tooling, and the realisation that forced me to re-evaluate my opinions. Initially I thought it was an inferior or limited set of tooling, however, I came to realise that it was in fact just an “Aggressively opinionated framework for safely deploying highly available microservices across the globe at scale to AWS”. I have since presented on this at the Melbourne AWS User Group. In that talk, I demonstrated a powerful feature, “Automated Rollback”, using an example pipeline that touches many other things I discuss in my blog post.
This example pipeline was created as a way to demonstrate many of the concepts I talked about in the original post. It is my honour to announce that I have open sourced this project and in this blog post I’d like to take you through a few of the projects features.
Dotnet to the Core
I love AWS, and I love .Net. While AWS do have pretty good support for .Net, I am constantly frustrated by the lack of detailed examples. This project is unashamedly .Net. If you are looking to replicate this for a NodeJS or Python project, then sorry, you’re going to have to translate it yourself.
Cross Account
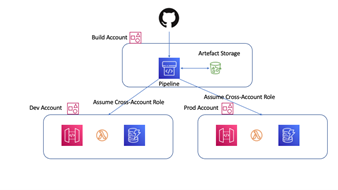
The first thing to note about the pipeline is that it is Cross Account. A dedicated “Build” Account deploys the example application to a “Dev” account and a “Prod” account. This is often a barrier to entry for individuals starting out in AWS CI/CD pipelines. Developers who are wanting to test out AWS features outside of their normal workday will often have their own account, but it takes a certain amount of dedication to set up an AWS Organisation and have 3 or more accounts that you can effectively use to do this. I would strongly suggest that as an individual, if you are serious about your AWS journey, you will eventually need to set up an AWS Organisation and have multiple accounts. It is the only way to get a good feel for AWS Organisations (which is a key topic for some of the more advanced certifications). That said, even if you don’t have an AWS Organisation, or even your own AWS account, I hope the code and structure will give you clues as to how to achieve things in your work AWS Organisation account structure.

The ideal state, in my opinion, is that every micro-service or application, should have a dedicagted set of AWS Accounts. At a minimum you should aim for a “Build Account” to host all your CI/CD infrastructure (the CodePipeline and artefacts), and then an AWS Account for each environment you wish to operate in. This enables you to set the policies on each of these accounts separately. For instance, you may grant AWS CodePipeline Full Access to the “Build” account for all developers. Then grant Admin permissions to the “Dev” environment account for all developers. Finally, you’ll want very restrictive (if any) permissions to the “Prod” account for developers, but Admin privileges to a SysOps team or platform administrator.
Build Once
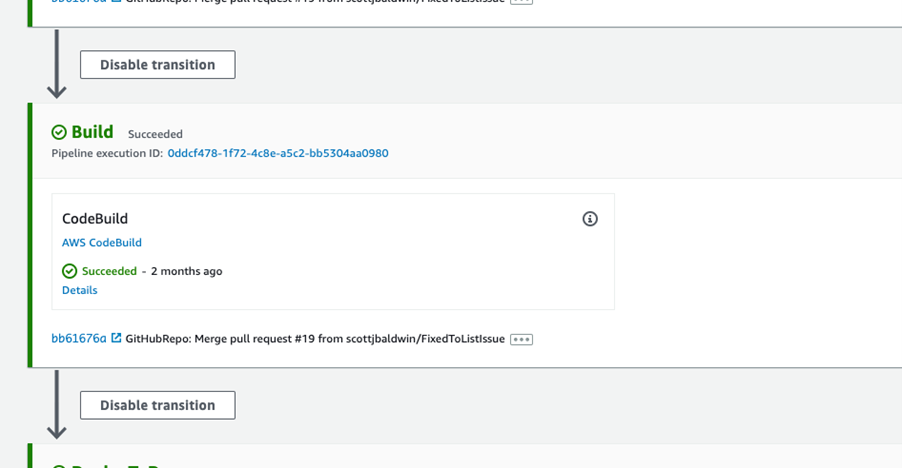
The next thing to notice is that there is a single “Build” phase.

This performs the following
- Building the .Net code
- Executing a suite of unit tests
- Prepare the CloudFormation package to be deployed
This deployable artefact is then re-used in every other environment, ensuring that the code that is tested in each environment is the same code that was originally built at that single point in time. This is key in eliminating a class of build time dependent errors that are incredibly difficult to debug. Deployments to each environment are now reduced to the act of deploying the built artefact, and then applying environment specific configuration. Any difference in behaviour between environments should then be traceable to configuration.
Automated Testing
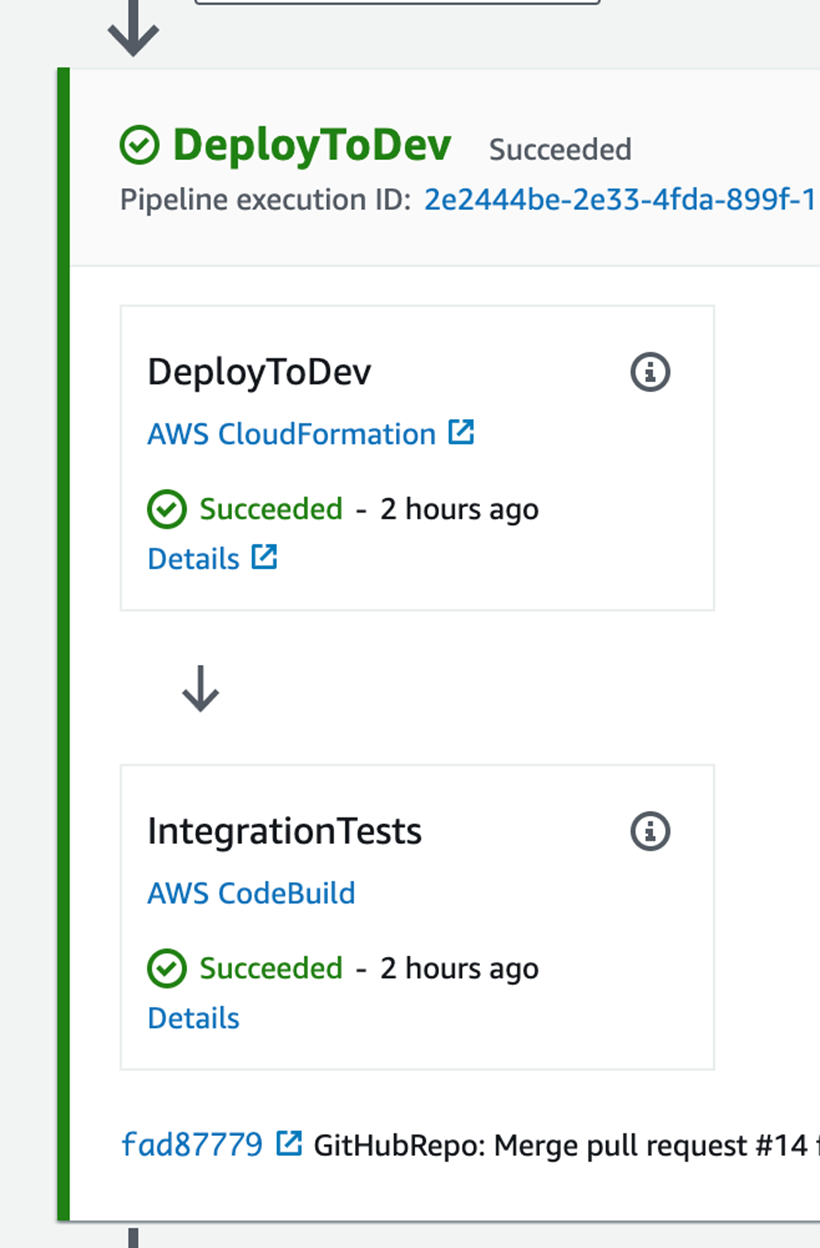
The “Dev” environment uses a suite of integration tests to act as an “Approval Gate”.

The integration tests must pass in-order for the pipeline to continue to the “Prod” environment. If you have more than 2 environments, the goal should be to run suites of automated tests in each of them. Each time varying the tests and increasing the quality bar required for the artefact to progress to the next environment. This might include API testing, UI Automation testing, load tests, etc. Each project will vary in the level of testing required, but the goal is to automate as much as possible.
Manual Approval Gate
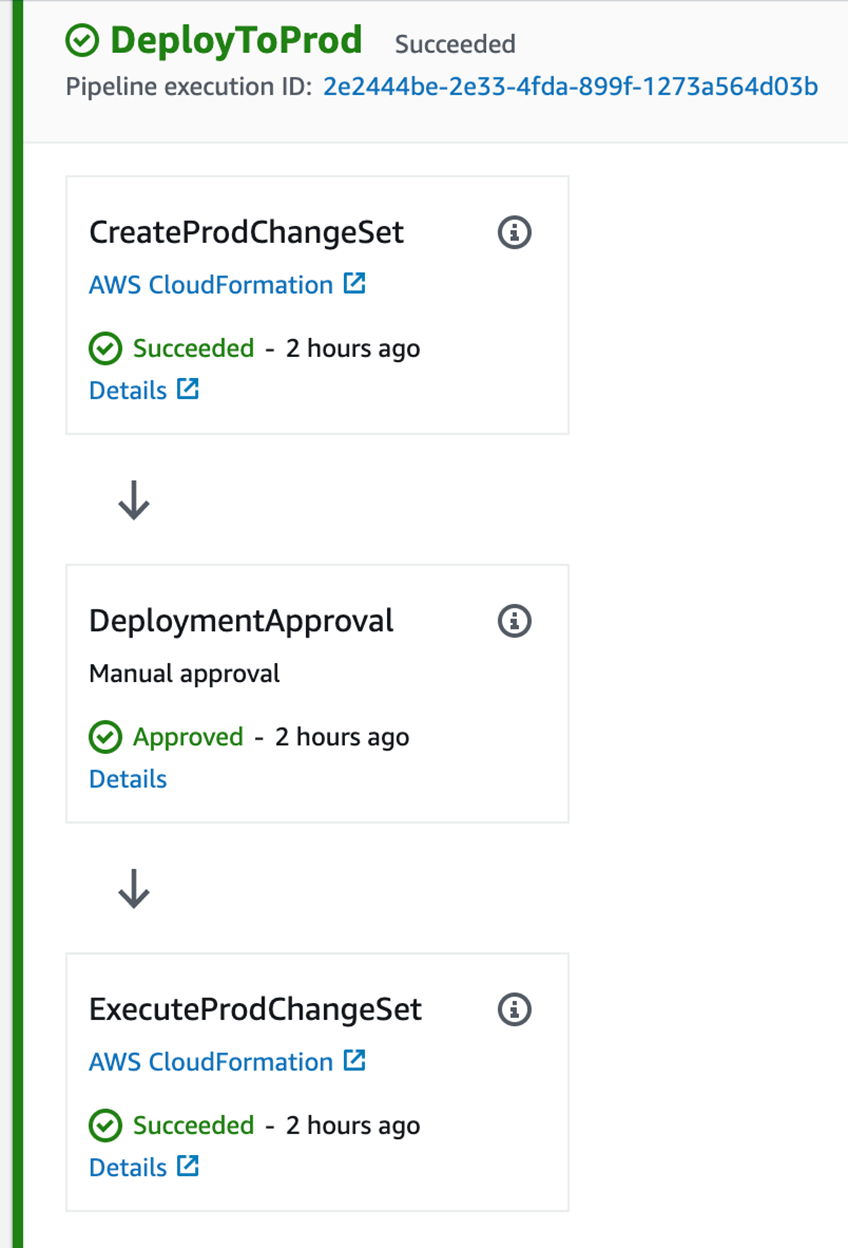
The “Manual Approval Gate” is part of the “Prod” deployment, but you’ll notice that it occurs after a CodePipeline action that creates an AWS CloudFormation change set, but before the action that executes it.

While you might think that this approval gate is designed to allow manual testers to perform validation in the “Dev” environment, this is not the case. As CodePipeline will queue up builds at each stage, once a stage has executed successfully, it will immediately execute the next build, so in all likelihood, if a team is practicing trunk-based development, the contents of the “Dev” environment may be subject to change, and it is the integration tests that are the gate keeper for “Dev”. If a manual approval gate is required for manual testing in the “Dev” environment, it would need to be the last action in the “Dev” phase to ensure no other builds are deployed until the gate is approved.
The real key here, is to allow an approver the opportunity to examine the CloudFormation changeset that is about to be deployed. If the changeset requires the replacement of certain key infrastructure components, there may be an outage of the application. This may give the approver the option of rejecting a change, or scheduling downtime in order to progress the change with minimal impact to the end users.
Automated Rollback
While there could (and probably should) be automated tests that run against production, I wanted to demonstrate the automated roll-back feature embedded into the AWS Serverless Application Model (SAM). SAM uses AWS Code Deploy to gradually switch incoming traffic over to the new lambdas that have just been deployed. There are a number of options here (as described by the DeploymentPreference ), I chose the “Linerar10percentEveryMinute” option, mainly for expediency when demonstrating. Your choice hear will depend on your load, but the key is that it allows you to dip your toe in the water so to speak. When the appropriate alarms have been configured and linked to the deployment, you can guarantee that if a bad release does somehow get past all your previous quality gates, the damage can be limited, and quickly repaired using a fix forward strategy.
Conclusion
I intend to keep adding to this project and enhancing it. For instance, currently, the Pre/PostTrafficLifecycle Hooks, don’t really do anything. In the future, I would like to demonstrate how these can be used to enhance the reliability of deployments. I am also keen for any feedback on this project (please raise issues or contact me directly). I would also happily welcome pull requests if there is something you’d like to demonstrate. I hope you find this example useful in your AWS DevOps journey.
